Saturday, September 16, 2023

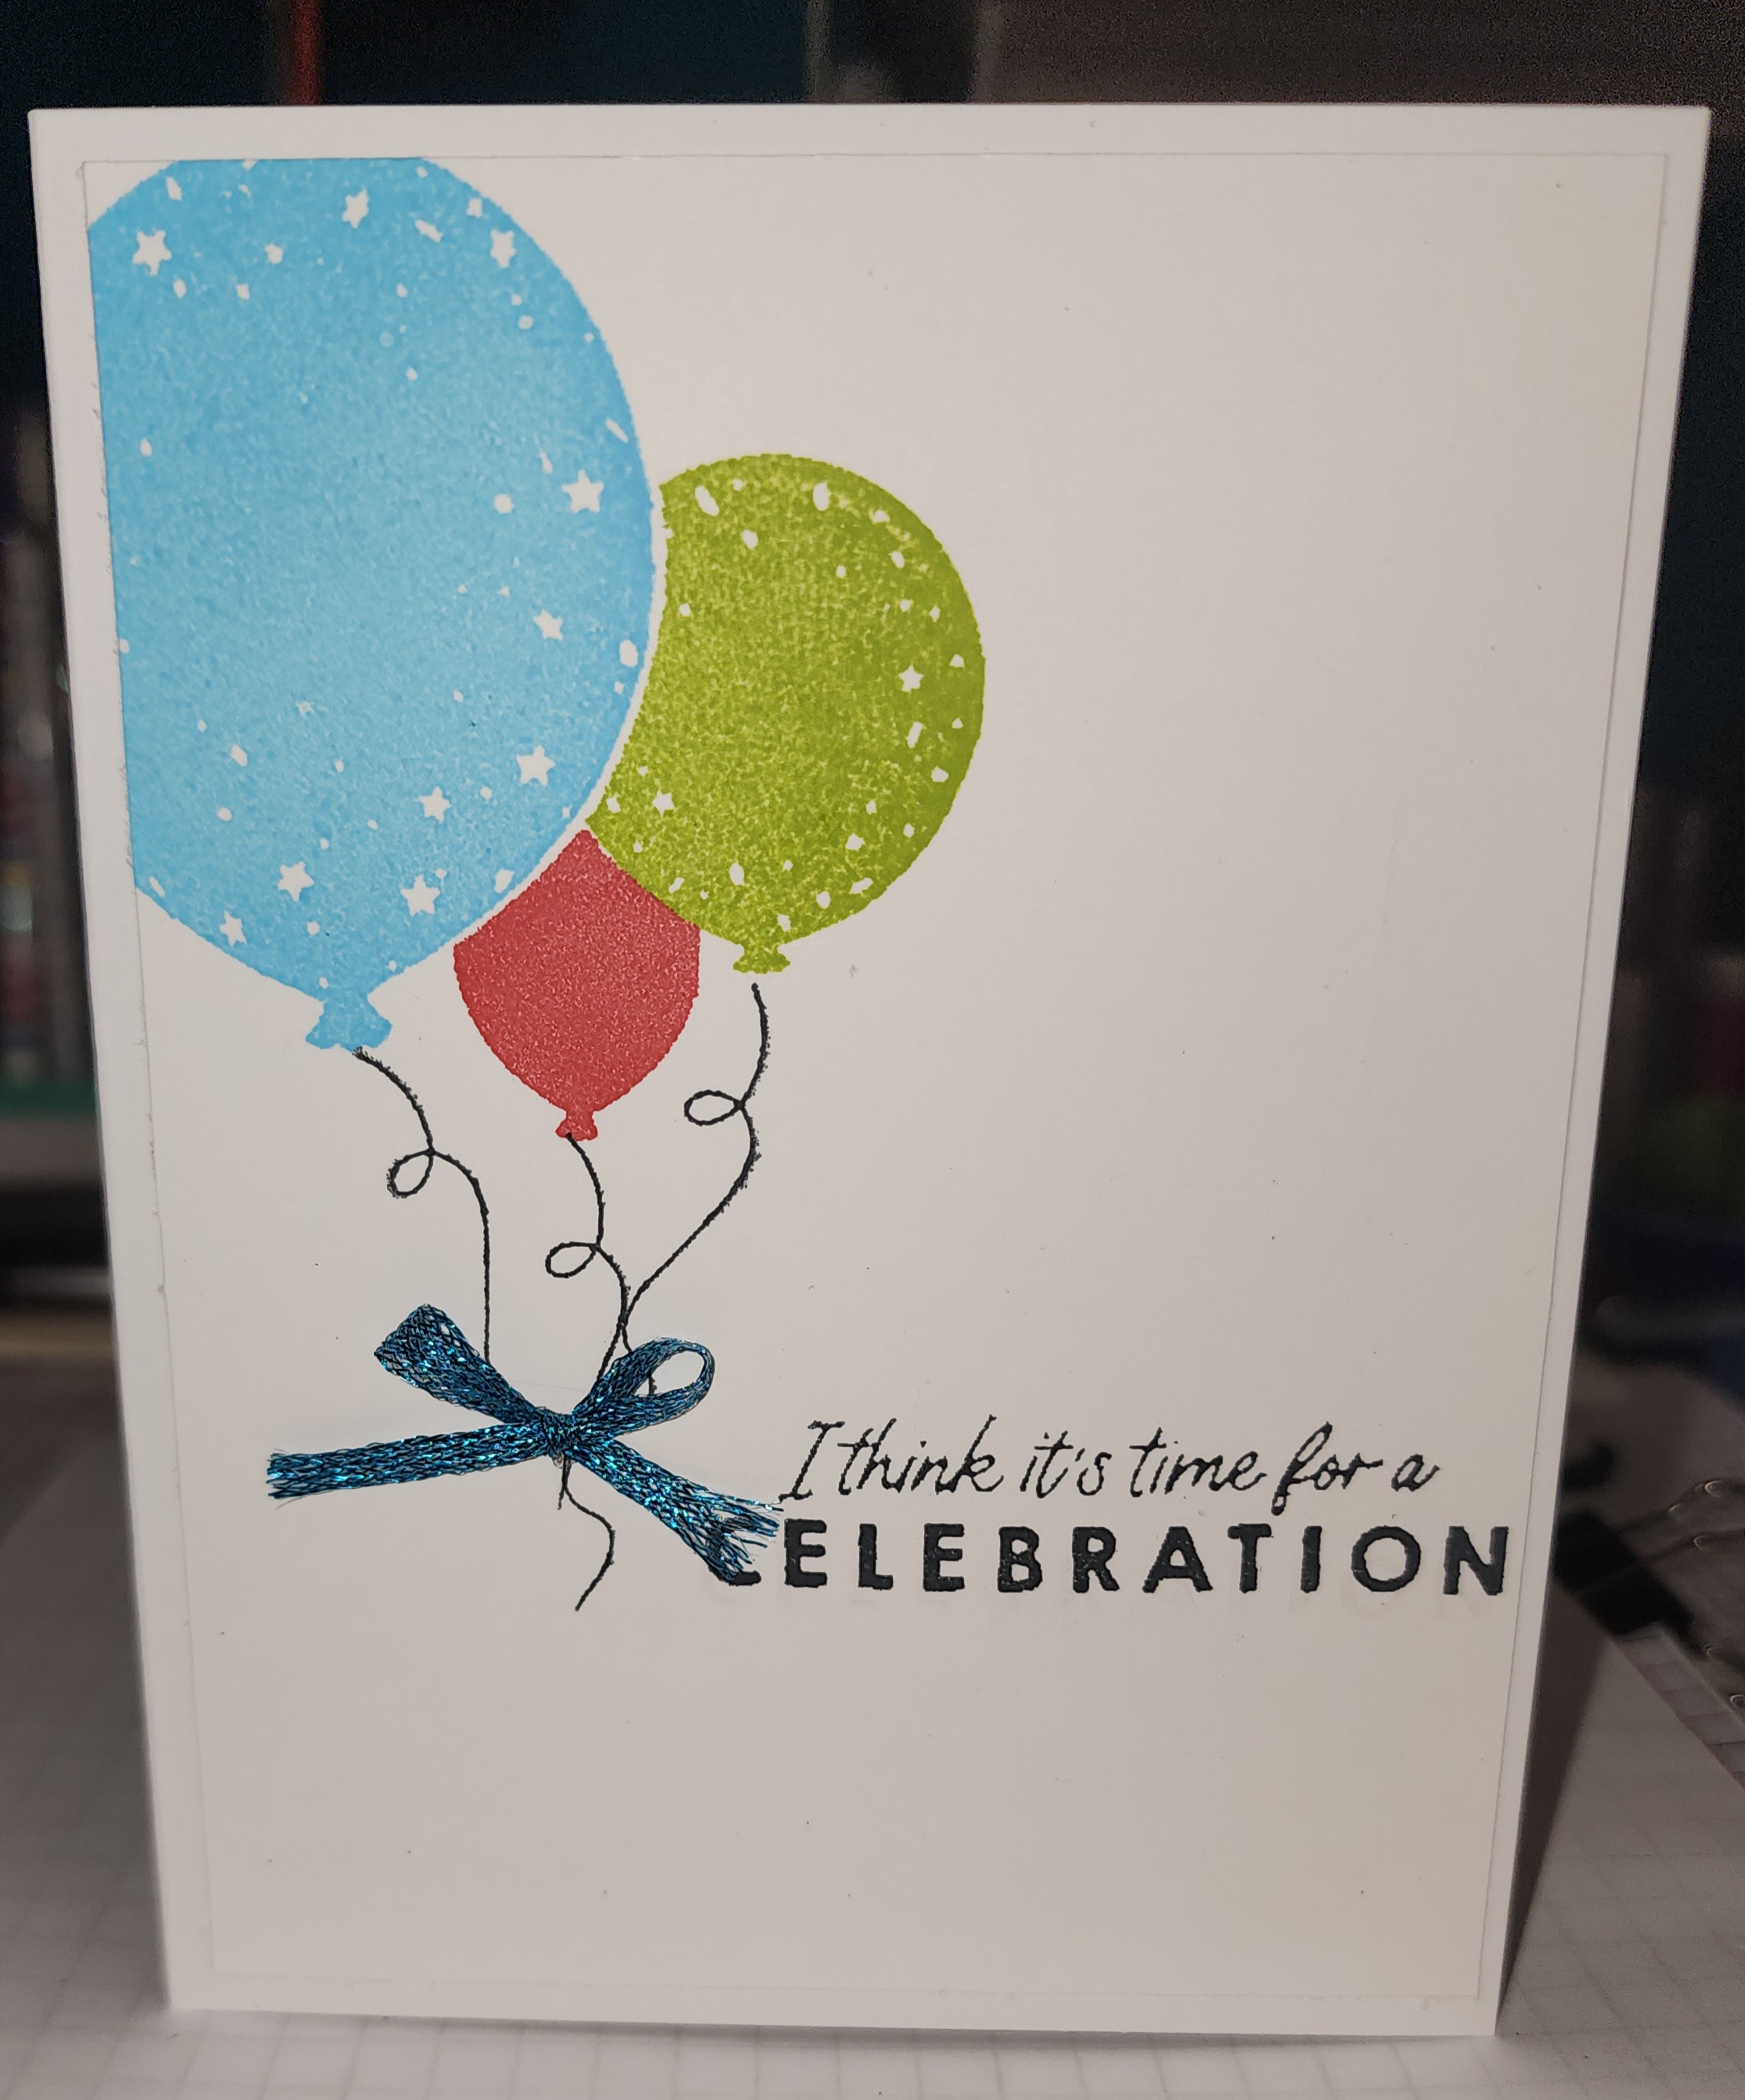
Its a Celebration


I started with a standard A2 size card and a 4 x 5 1/4 panel of basic white thick cardstock and using the beautiful balloons set from the stampin up annual catalog I stamped the largest balloon in tahitian tide, I used post it tape to make masks for all 3 sizes and placed them to stamp the other balloons in lemon lime twist and sweet sorbet.  I stamped the strings for the balloons in memento black and used the same colors inside as well.  I left plenty of room to write inside as I stamped the sentiment in the upper corner by the images.  I used a small pc of tahitian tide metallic ribbon to make a bow that I attached with a mini glue dot.  I am thrilled with the finished product!!  I am submitting to the following challenges:


life really is better when you are crafting


I completed this project in a little over 6 minutes when I decided how I wanted to lay it out.  I made it specifically for the As you see it Challenge.  They are having a speed challenge with the theme of hobbies this time around and that was something I could definitely get behind!!  I pulled out the crafting with you bundle from stampin ups annual catalog, a standard A2 size card and a panel of basic white thick.  I scored the panel in the middle both ways and stamped inside of the areas.  Ink colors used were boho blue for the die cutting machine (I have the boho blue mini), Moody mauve, wild wheat, memento black and night of navy.  I also used a panel of moody mauve dsp to have a little color behind my main panel.  I forgot I also used old olive on the leaves of the little flowers.  I used mashing to stamp the yarn inside the basket and just love the results.  I actually am very happy with the project.  I love how it turned out.  I am submitting to the following challenges (as I stated above):


Rustic crate and plaid


I made this project using basic white thick, a standard A2 sized card, The gingham DSP from the stampin up annual catalog and the rustic crate stamps and dies from the new mini catalog from stampin up.


I like I think most people had a little trouble with the cute little crate dies.  After cutting it out I too was trying to put it together backwards (I saw a couple videos where people were doing exactly that) I finally figured it out and just love how cute it is with the little name plate to add to the front and even a tiny for you stamp to fit in that area.  I also used the darling details dies from the annual catalog to cut the gingham frame out.  I love that whole bundle as well.  


I stamped the crate off the edge a little and another image to put inside the crate off the edge and colored with blends.  I love the hello word die and little gloves that comes with this bundle too.  Its all adorable and put together think it makes a pretty spectacular card!!  I will be submitting to the following challenges:


Monday, September 11, 2023

zombie Disco


I started this project with a panel of basic white card stock and used ink blenging to make the background look like a night sky with a big bright moon.  I used the 2nd largest die from layering circles to make a mask to blend on the moon then to cover that while blending the blues on.  I used a post it note I had cut to shape to give the look of the gray coluds coming in front of the big bright moon.  All of my little zombie people and the zombie disco came from the whimsy stamps set, the little grassy area came from that set as well.  This was such a fun card to do and the whimsy stamps set made it extremely east to do.  I would be more than thrilled to use their products much more in the future.  I had the best time stamping all of the different elements and thought the set worked beautifully.  I will be submitting to the following challenges:


Floating Element Technique


I started this project with a panel of very vanilla cardstock cut to 4 x 51/4 inches.  I cut the element from the daisy dsp, in the stampin up annual catalog, into 1/4 inch strips.  Colors used are wild wheat, pebbled path, copper clay and pretty peacock.  I cut the flowers and foliage from the dainty delight bundle and the Thanks sentiment is from the hand penned petals set.  


I attached the strips to a panel of acetate and die cut the circle from the stylish shapes die set.  I used foam strips to adhere the circle to a standard A 2 size very vanilla thick card base.  I have left the inside blank so it can be written in and stamped when needed.  I am very happy with the way it turned out.  I will use the layering circles dies for the circle if I make another project like this only because I would have preferred a less decorative circle for my floating element.  I will be submitting to the following challenges:

TGIF Challenges!- #tgifc437


Saturday, September 9, 2023

Oh xmas tree


I started with a standard a2 card base of basic white thick cardstock.  I cut the tree from the lights aglow bundle (retired) from stampin up.  I cut the rectangle behind the tree and ink blended a tiny bit of lemon lolly ink around the tree to give the appearance of light.  I cut the present out from the sending cheer bundle and used the merry and bright dsp, both in the stampin up mini catalog.  I stamped the medium snowflake all around the card base in lemon lolly.  I used a 1/2 inch strip of basic white to stamp my sentiment.

I used the same set to stamp the inside greeting and added the same medium snowflakes as the outside.
I also cut the star from thew lights aglow bundle at the top of the tree in lemon lolly.  I used the retired color evening evergreen for my tree.

I love the way this project turned out, very cas.  I will be submitting to the following challenges:


Saturday, September 2, 2023

Timeless Fall Color Combo


I started with a standard A2 card base in basic white thick cardstock and cut a piece of the fresh as a daisy dsp, available in the stampin up annual catalog, I used the back side which is the mostly solid copper clay and I also cut a 1 3/4 pc of copper clay cardstock and cut the angle and adhered to my card front leaving just a bit of the white base showing.


I used the timeless arrangements bundle to cut the dies out and to stamp the images.  The detailed dies are all cut from pecan pie cardstock and the others are stamped in copper clay and colored in using misty moonlight and a blender pen.  I love the look I am able to achieve with that technique.  I stamped the sentiment in misty moonlight and the little rings are stamped off pecan pie.  It isnt sticking out a bunch but I did use misty moonlight ribbon behind that.  I am submitting to the following challenges:


Festive Friday- die cuts, flowers, thank you


Please check out my other blog!!

 I have added the link to my other blog that I have started.  This blog will be associated with my youtube channel, my instagram and will at...