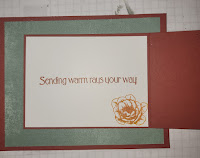
Wednesday, August 30, 2023

Merry and Bright


I started with a 4 1/4 x 11 ( half sheet) of basic white thick cardstock, scoring at 5 1/2.  I attached a panel of 4 x 5 1/4 the new merry and bright DSP from stampin up.  I used the deckled edge dies to cut out the center to create my aperture.  I then used the merry and bright dies to cut the lights and light string out using scraps of pretty peacock, daffodil delight, pumpkin pie, sweet sorbet, garden green and azure afternon cardstocks.  


After attaching the lights to the string I then adhered then to the inside and the front using liquid adhesive.  I then used the merry and bright stamp set to stamp the merry christmas in real red and the to you and yours in evening evergreen then just cutting out using paper snips.  The piece of cardstock used to bring the whole tent look together I cut basic white thick cardstock to 3 x 4 1/8 and with the 3 inches at the top scored every half inch.  I then folded this into an accordian fold and adhered to the botton so my card would stand properly.  I love the bright colors of the merry and bright DSP and the fun stamps and dies.  These are all available at a 10 % discount if you buy the bundle in the mini catalog from stampim lodge.  I will be submitting to the following challenges:

Monday, August 28, 2023

ROYGBIV

I started this project with a note card from stampin up.  I used a stamp from the sweet conversations (retired) stamp set.  I stamped the rainbow using the following ink pads:
Sweet Sorbet- R
 pumpkin Pie- O
Lemon Lolly- Y
Granny Apple Green- G
Blueberry Bushel- B
Starry Sky- I
Gorgeous Grape- V


I used the just my type stamp set, from the 2023-24 annual catalog, for the sentiment.  It went with the project perfectly.  I stamped the insode to match and even stamped the envelope to go with the card.  


I love a clean and simple card that is made with just stamps, ink and paper.  Its a card that took very little time but looks like it took a ton of work.  I know I would love to receive this card!!  I will be submitting to the following challenges:


Sunday, August 27, 2023

Happy Birthday Shutter


I had been seeing faux shutter cards all over and loved the way they looked so I decided I would try one with my own tweaks to it.  I am actually very happy with how it turned out (not terrible for the first one I ever made).  I stamped the cake from curved occasions, in the new stampin up mini catalog, and colored with my ink and blender pen.  I really like the look I get coloring my images that way and its so easy.  I used the punch that comes with this if you purchase the bundle (savings of 10 % if purchased as a bundle so why not!!).  I stamped the Happy Birthday in memento black ink on the punched out cardstock.  I really like the colors, bubble bath, lost lagoon and lemon lolly together, they are so soft and pretty.  I will be submitting to the following challenges:


Friday, August 25, 2023

Tricks & Treats


I made this card using the new tricks and treats bundle from stampin up.  It comes with some seriously cute halloween images ass you see above and some dies that are to die for!!  Mainly one can make the cutest little treat bags with the dies but so much more can be done you just have to think outside of the "bag" ha ha.  I ordered the new them bones dsp but It was not put in my order (should be her any day) but a friend of mine let me use a couple pcs of it and let me tell you im excited about getting it bc it is super cute.  I used pumpkin pie, basic black and basic white as well.  


I just recently got the tag topper punch and the modern label punch so I was able to make my very own flippy flappy card and I must say being a halloween lover I am really pleased with the end result.  I am also really pleased with this bundle and will definitely be making treat bags for my daughter to take to school for their halloween party.  I am submitting to the following challenges:


Thursday, August 24, 2023

Butterfly, Embossing folder, Gatefold and Flowers


I made this using the butterfly Brilliance Bundle (retired) from stampin up.  I stamped the entire stamp, which is several butterflies on one large stamp, ink blended the colors of the flowers from the front and then cut out from the single large die.  I then cut out the single, detailed butterflies from vellum card stock.  I used the new tile embossing folder on the front panels after I stamped the bottom full of flowers and leaves from the pretty perennials stamp set (retired).


Inside I added a little lone butterfly to complete my project.  I chose the column with gatefold, flowers, stamps and of course the butterfly for the current Butterfly Challenge and will also be submitting my project there.


Tuesday, August 22, 2023

P= Presents and Q= Quick


I started with an A2 size card base of thick basic white and a 5 1/2 x 4 1/4 panel of basic white.
On the panel of basic white I stamped the merry from the new stamp set from stampin up called more wishes.  I used my stamparatus and using the hinge step technique I stamped in poppy parade, old olive, sweet sorbet and parakeet party.  I then stamped the christmas in parakeet party and sweet sorbet.  The cute little gift I stamped in parakeet party and cut the bow in sweet sorbet from the sending cheer dies and stamp set.  


Inside I used stamps from more wishes for the sentiment and sending cheer for the holly and berries.  I knew I had to have this stamp set as soon as I saw it in the stampin up mini catalog because I have the biggest wish set from the last annual catalog.  I love the big, bold fonts and love how both sets also have the pretty scripty fonts in all the same words.  Hinge step stamping with the stamparatus allows me to get perfect placement everytime, I do not have to move the stamp itself or the cardstock, just move my stamparatus plate down.  I will be submitting to:

ABC Christmas Challenge- P= presents, Q=quick


Monday, August 21, 2023

Christmas Wishes all Around


I started with a basic white thick A2 card base.  I added a panel of poppy parade and a panel of the new merry and bright DSP.  I also cut the pretty decorative edge form the prized peony dies.  I stamped the trees in pear pizazz, I used the large round framelit from the new wishes all around bundle from stampin up.  I used the layering circle dies (retired) to cut the poppy parade circle to put behind the trees.  I stamped the sentiment in versa mark. added white detailed embossing powder and heat set with my heat gun.  I used the black and white  gingham ribbon for the decorative edge and the bow.


Inside I stamped the sentiment in memento black and added a 1/2 strip of the same DSP as above.  I stamped 3 little trees from the same stamp set.  I love the Wishes all Around bundle.  Its got some really nice stamps and dies and I have been having lots of fun creating with it.  I will be submitting to the following challenges:


Sunday, August 20, 2023

Fall Vibes


I began by cutting a panel of basic white card stock 4 x 5 1/4, I then took a large post it and riped in half then placed it on the panel and blended mango melody and crushed curry inks onto the middle area with blending brushes.  


After achieving the blend I was happy with I used pumpkin Pie to stamp the largest leaf and the 3 connected leaves from the gorgeous leaves set by stampin up (retired).  This was my first time using the torn paper as a mask technique and I must say I really enjoyed it.  I only recently began blending inks and its very relaxing.  I can get lost in it and totally lose track of time.  I feel that all 3 ink colors while very different are all in the orange family and therefore very good for a fall theme.  I found the insidse and outside sentimentsin the hello harvest stamp set from stampin up (retired) and felt they worked very well on this project.


On the inside I simply stamped one of the large leaves matching the outside leaf in pumpkin pie and using memento black ink stamped the sentiment directly to the card.  When I was finished working on all the elements I used liquid glue to adher the panel to a standard A2 card base.  I had considered embossing for a bit of texture but did nit think I would have been happy with that look at all.  I love CAS cards that are really just stamp, inks and paper and this one is definitely those things, clean and simple.  I will be submitting to the following challenges:


Friday, August 18, 2023

Black and white christmas


I started this project with a panel of basic black cardstock 5 1/2 x 4 1/4 and a panel of basic white 2 x 5 1/2.  I used the detailed snowflake stamps from the sparkling snowflakes stamp set available in the new mini catalog from stampin up September 6th, placed both panels in my stamparatus, covered the black and stamped the white panel in versamark after positioning my stamps where I wanted them.  I stamped with versamard x 2 then added black embossing powder and set with my heat gun.  I then stamped with my stamps in the same position with versamark onto the black panel only, applied white embossing powder and heat set.  Then I stamped and embossed as above after stamping to fill in open areas.  


I stamped the sentiment also from the same stamp set on basic black and applying white embossing powder and heat setting.  I used my paper snips to cut around the sentiment and after doing that it just happened to fit perfectly in the space on the white panel.  I used dimensionals to adhere it to the white panel and the white panel to the black.  I used stampin seal + to adhere it all to the front of an A2 basic white thick card base.  I love this stamp set, instead of dies the set has a punch available if you purchase the bundle which would also save you 10%.  It is an adorable snowflake tag topper and I love it too.  Im very happy with the way this turned out and will definitely be sending this at card time!!


I am submitting this project to the following challenges:


Thursday, August 17, 2023

Sparkling Snowflakes


I threw this card together in about 5 minutes because the stamp sets in the new mini catalog are gorgeous and this one called Sparkling Snowflakes is no exception.  It does not come with dies but instead a beautiful tag topper punch, I love it.  The snowflakes are 2 step with a solid image that can be stamped behind the detailed image but for this card I only wanted detail.  I put a piece of blue painters tape that I had stuck to my pants to remove some tack then stamped in starry sky, fresh freesia and tahitian tide inks.  I then used a ruler and the tahitian tide stamp n write marker to make straight solid lines out side of the middle area where I stamped a sentiment from the same set 3 times in memento tuxedo black.  I put it on a panel of the new specialty dsp and then adhered both to a tahitian A2 size card base.  I will be submitting this project to the following challenges:


Friday, August 11, 2023

A tag punch?!?


I started with a piece of 5 1/2 x 8 1/2 bubble bath cardstock and used the tag topper punch and slowly pushed the cardstock into it and made sure the punch sat flat on its side the punched, I repeated on the other side and that made my decorative areas line up perfectly.  I then used my paper trimmer, lining up the excess cardstock in the cutting window and cutting until I "felt" the paper cut through, I then repeated on the opposite side.  This left me with the 2 cute ends as seen above.  I then scored the cs at 4 1/4, lining up the straight edge not the decorative edge, turned it around and simply scored the tag part.  Burnished both with my bone folder.


I cut out 2 panels of misty moonlight and basic white cardstock and adhered the to each other then to the card but before that I used the pretty perennials and the delicate details stamp sets (both retired) to stamp the images on the front and inside.  After adhering the cardstock to the card I cut a piece of misty moonlight ribbon and threading it through the back of the "tags" I tied a bow to hold the card together.  I love this design and have already planned several more projects, even ordered new ribbon from the new catalog to have more options.  I will be submitting this project to the following challenges:


Thursday, August 10, 2023

Joy Fold


I began this joy fold fun fold with a piece of cajun craze cardstock, 4 1/4 x/8 1/2 scored at 5 1/2 and another piece 3 x 8 scored at 4 for the smaller card opening the opposite way.  I then used 3 different panels from the desert details suite and stamped the flowers on basic white.  The flowers as well as the little images on the flap and the greenery were all cut using the desert details dies.  I stamped the sentiment also from desert details in cajun craze and fussy cut around it and adhered it with dimensionals.


On the inside I satamped the flower the same as the 2 above in crushed curry and took a sponge dauber and just dabbed a little cajun craze in the middle.  I also stamped the inside sentiment in cajun craze.  I really love this fun fold.  Its so easy with endless design possibilities.  I will be submitting this project to the following challenges:
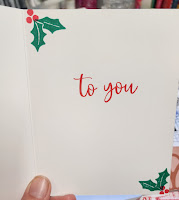


As seen in Black & White


I began the card by cutting an 8 1/2 x 11 piece of basic black cardstock in half on the long side and scoring in half.  I also cut a 4 1/4 x 5 1/2 panel of basic black the I adhered the black and white polka dot dsp to the bottom half before embossing with the basket weave embossing folder.  I stamped the hello with the alphabest stamp set and the other images are from the just my type stamp set.  


For the inside I used the sentiment and hearts also from the just my type set.  Its very simple but I love the way it turned out.  Its just an all occasion that anyone would love to send or receive.  Everything used to create this project is available currently from stampin up.  I will be submitting this project to the following challenges:  


Tuesday, August 8, 2023

Arrangements that are Timeless


I started this card by cutting my cardstock with my paper trimmer and my chosen dies.  I am using lemon lolly, soft seafoam, fresh freesia, basic gray and bubble bath cardstocks.  I embossed the top lemon lolly with the cascading ribbons folder and the tall flower pots (rectangles) with the basketweave folder.  I cut the greenery and flowers for the pots with all of the colors except basic gray.  I cut the circle and the little tag out using basic white catdstock.  


For everything on this card I used the timeless arrangements bundle.  With the exception of the circle which is from the stylish shapes dies, I love the stitching which my layering circles does not have.  I used hydrangea haven for the little tag bc its just so adorable and the perfect size for this project.  The sentiments inside and out are from the timeless arrangements set and they are such a beautiful scripty font and the stamp set has so many options for mixing and matching words.  This is one of the most versatile sets that gives you so much bang for  your buck.  The flowers and greenery cut out attached to a little bar so you can adhere them to each other and to the 3 different sized rectangles perfectly.  They can be cut down as needed but there are also individual small bunches of the flowers and leaves.  I added a little bow made from fresh freesia ribbon and the little thanks tag with mini glue dots.  Lately I have been stamping my inside sentiment near the bottom leaving plenty of room to write in.  Everything on this project is either retired or available from stampin up.  

I will be entering this project in the following challenges:

Cupcake Inspirations- Live in the US


Beautiful Bouquet


I started this card with a base of basic white thick cardstock then adhered a panel of DSP from the beautiful balloons paper, lastly I adhered a panel of freesia that I cut the cute bottom with a die from the darling details bundle.  I also threaded a piece of fresh fresia through the edge as the die is made for weaving ribbon through.  It is one of my favorite bundles of all time.  I stamped the images in fresh freesia outlined with highland heather, lemon lolly outlined with daffodil delight and lost lagoon stamped off then outlined with first generation ink.  I cut everything out with the other dies from the set.  For the sentiment i used a 1 3/8 inch oval punch (retired) and stamped in versa mark ink and heat embossed with black embossing powder.


Inside I attached a 1 x 5 1/2 inch piece of the same DSP from the outside and then stamped the little cute flower and stem from the darling details set using the same colors as before.  I used the rest of the 6 x 6 DSP on the envelope flap, I adhered using liquid glue and trimming any overage.  This bundle is absolutely beautiful and has so many great dies that the possibilities are endless.  I would recommend this bundle to anyine because it is so versatile and so beautiful.  I love this card so much I think its one of the prettiest I have ever made.  The colors are so nice together, and they are just the right amount of subtle with a bit of pop.  I am over the moon happy with the finished card.  I will be entering in the following challenges:


Cupcake Inspirations- Live in the US


Monday, August 7, 2023

Shaky Shaky!!


I started this card with a base of balmy blue cardstock 5 1/2 x 8 1/2 scored at 4 1/4.  I cut the shaker frame from basic white textured shimmer paper, I also cut the 3 snowmen the extra snowflakes and the snowbank in the background using the same shimmer paper.  I cut the hats for my snowmen with the shaded spruce shimmer from the same specialty paper pack.  I used a panel of basic white as a mat that I adhered a panel of the blue dot paper from dandy designs.  I thought the colors and dots would be the perfect background for my little snowy scene.


Everything on this card was cut or stamped from the snowman magic bundle (retired) from stampin up.  I used basic black for the banner and stamped the sentiment from the same set in versamark and heat embossed with white embossing powder.  Inside I stamped the trees in shaded spruce and the trunks in early espresso (used stamp n write markers)  I then stamped the large sentiment inside using memento ink.  All products used on this adorable shaker card are from stampin up with the exception of the glitter I used inside as the shaker element that is frostbite from the glitter grind and if you look closely it turns
from white to blue under uv light.  It may not be as noticible in the pictures.  


I will be entering in the folowing challenges:


Sunday, August 6, 2023

Ice cream social part 2


I started with basic white thick stampin up cardstock and stamped the background on the lemon lolly cardstock with lemon lolly, I colored the main image with the stampin up watercolor pencils, I attempted to make it look like vanilla, strawberry and chocolate ice cream in a waffle cone.  I dont think it was a terrible attempt (I know I need more practice with all things watercolor)  I atamped the sprinkles on each scoop and I was impressed how something so small added so much to it!!  I also stamped the confetti all over the main card base and then stamped the Happy Birthday sentiment 4 times bc It fit perfectly in the space I had plus I love the font for this sentiment.  I was overall beyond pleased with the end result!!  I will be entering in the following challenges:


Im a paper florist


I started out with a 4 1/4 x 11 piece of berry burst card stock.  I scored at 5 1/2.  I took the die (a stampin up retired set of 2 that I cannot remember the name atm) and cut out the bottom part.  I used the paper florist dies from stampin up to make the different flowers using berry burst, lemon lolly and azure blue I alos cut the leaves using pear pizaaz and shaded spruce. For the inside I just used a 4 x 5 1/4 pc. of basic white and stamped the sentiments in memento black.  Its so bright and cheery and makes me happy.
I will be entering in the following challenges:


Friday, August 4, 2023

This little Piggy


I made this cute little piggy card using pecan pie cardstock 5 1/2 x 8 1/2 scored at 4 1/4 and a panel of pecan pie 4 x 5 1/4.  I also stamped the woodgrain in pecan pie from the stampin up retired set gorgeous leaves.  I stamped it all over the panel 1st 2nd and even 3rd generation stamping to get the look I liked.  I used the stylish shapes dies to cut the circles out and used the peek a boo farm stamp set to stamp the piggies.  I used light and dark bubblebath stampin blends to color them.  I made one a little boy piggy and added a bow to make a little girl piggy.  This is a very simple card that I had finished in under 15 minutes and I love how it turned out.  I am actually very happy with the end result.  I ink blended a little balmy blue behind them to give the appearance of sky behind them.  I stamped the sentiment on a 1/2 inch scrap of basic white and cut the banner end with just my paper snips.  I will be entering in the following challenges:
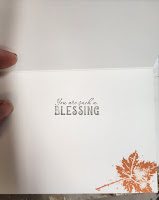


Lattice

I made these lattice cards after watching Gina from Gina K Designs make them.  I have made a much simpler version several times so seeing th...